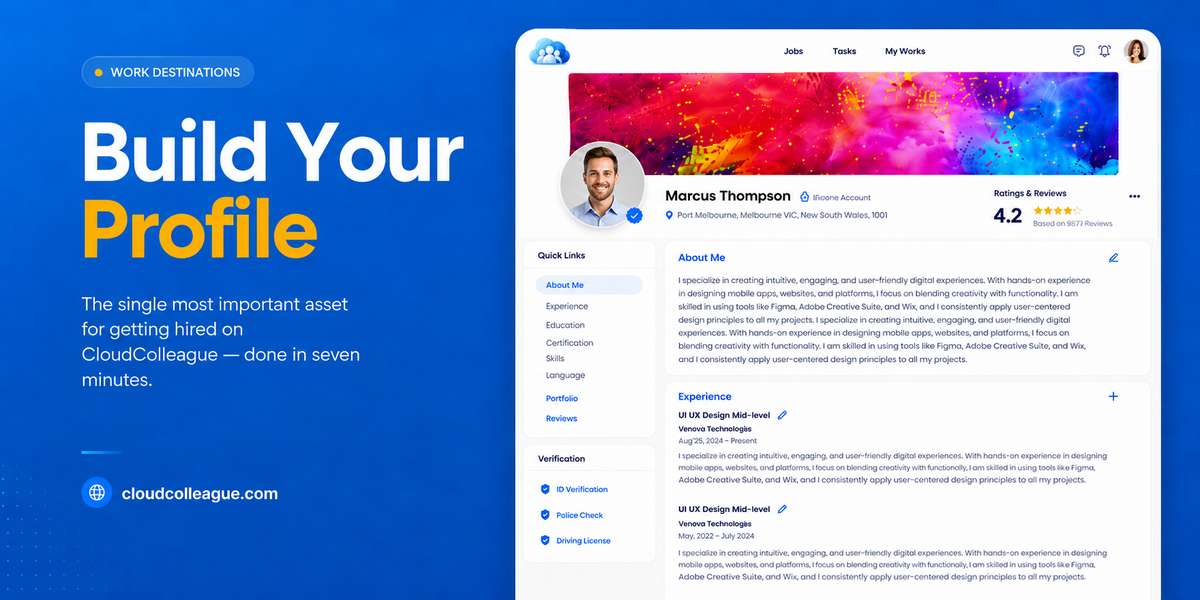
A strong CloudColleague profile is the single most important asset for getting hired on the platform. It determines who finds you, who shortlists you, and whether an employer or client reaches out at all. This is true on every major Australian work platform, and CloudColleague is no different. This guide gives you a clear, no-fluff walkthrough that most users complete in under 10 minutes. This guide gives you step by step guide on how to create a CloudColleague profile.
| Quick Answer: How to Create a CloudColleague Profile To create a CloudColleague profile, visit CloudColleague, sign up with your email or Google account, and complete each profile section: professional photo, headline, 2 to 3 sentence summary, 8 to 12 skills, work experience with quantifiable results, education, certifications, resume PDF, and work preferences. Set whether you want full-time, freelance, or project work. Most users complete the full setup in 8 to 10 minutes and can apply for their first opportunity immediately. |
Why Does Your CloudColleague Profile Matters?
CloudColleague’s discovery system surfaces complete, well-written profiles to employers and clients first. Partial profiles simply do not reach the same audience. Profile completion at 100% significantly outperforms partial profiles on every major Australian job platform, including SEEK and LinkedIn, and CloudColleague behaves the same way.
The Australian-market angle matters here too. CloudColleague verifies employers and clients before their listings go live, which means your profile reaches real, vetted opportunities rather than outdated or inactive postings. There is also a structural advantage unique to CloudColleague: a single profile gives you access to full-time roles, freelance tasks, and short projects simultaneously. That is three opportunity pools from one setup.
Learn more about CoudColleague on How to use CloudColleague before creating a CloudColleague Profile.
7 Steps to Create a CloudColleague Profile
Step 1: Sign Up at CloudColleague
Visit CloudColleague and click Sign Up. You can register with your email address or connect via a Google account and start as a seeker. A verification email arrives within 1 to 2 minutes. Signup is free and takes under 2 minutes before you reach the profile setup screen.
Step 2: Upload a Professional Photo and Write a Strong Headline
Your photo should show a clear face against a neutral background. It does not need to be a formal headshot, but it should look professional and approachable. Profile photos are the first thing employers and clients see in search results, so this is not a step to skip or delay.
Your headline should be a single sentence that names what you do and who you do it for. “Bookkeeper for small Australian businesses” outperforms “Bookkeeper” every time. The headline is the second thing people read after your photo, and a specific one creates an immediate relevance signal.
Step 3: Write Your 2 to 3 Sentence Summary
Your summary needs to cover three things: who you are, what you do, and one concrete achievement or signature skill. Keep it short and specific. Australian recruiters consistently flag vague phrases like “hard-working”, “dedicated”, and “team player” as weak signals, so avoid them entirely.
Run your summary through Grammarly or a similar tool to catch grammar issues before you publish. Here is a working example of a strong summary:
“Senior digital marketer with 8 years’ experience leading B2B campaigns in Australia. Specialised in LinkedIn lead generation and account-based marketing. Most recent campaign delivered $1.2M in pipeline within 6 months.”
That summary names the specialism, the market, and a measurable result. It gives an employer or client something concrete to act on.
Step 4: Add 8 to 12 Skills Using Exact Phrasing
Skills are how CloudColleague matches your profile to relevant opportunities, so the phrasing matters. Use the exact terms that employers and clients search for, not creative variations. “Project management” works. “Managing projects effectively” does not surface the same results.
Mix hard skills, such as tools, software, and certifications, with soft skills like stakeholder management and client communication. One sentence on what to skip: vague skills like “leadership” without context are weaker signals than specific ones like “leading 5-person engineering teams”. If you cannot demonstrate a skill in an interview or brief, do not list it.
Step 5: Add Work Experience with Quantifiable Results
For each role, include your job title, employer, dates, and 3 to 5 bullet points. Lead every bullet with an action verb and follow it with a result that includes a number or a specific outcome. The pattern “Reduced customer churn by 18% through redesigned onboarding process” is far stronger than “Responsible for onboarding”.
If you want a full breakdown of how to structure your work history for maximum impact, follow the resume writing guide before completing this section.
Step 6: Add Education, Certifications, and Verifications
List your highest qualification first, then work backwards if relevant. Add any certifications from TAFE, Australian universities, LinkedIn Learning, or Coursera Australia. If you work in a regulated profession, include your registration with the appropriate body: AHPRA for healthcare, CPA Australia for accounting, Engineers Australia for engineering, or ACS for IT professionals.
Verified credentials surface higher in CloudColleague’s matching system because clients filter for them directly. Leaving this section incomplete when you hold relevant registrations is a missed visibility opportunity.
Step 7: Set Your Work Preferences (the Critical Step Most Users Miss)
This is the step that unlocks CloudColleague’s three-in-one model, and it is the one most new users skip entirely. In your work preferences, indicate your availability for full-time, part-time, casual, contract, freelance, or project work in any combination that reflects your actual situation. Add your preferred location, whether that is remote, hybrid, on-site, or a specific Australian city.
You can also add your hourly rate or salary expectation if you are comfortable doing so. Full-time workers who mark themselves available for after-hours freelance tasks dramatically expand their opportunity pool with zero extra effort. If you are a freelancer or contractor, you can link your Australian Business Number through the Australian Business Register integration, which enables faster invoicing and builds client confidence.
Ready to create your CloudColleague profile in under 10 minutes?
CloudColleague is free for job seekers and freelancers, takes a few minutes to set up, and gives you instant access to full-time jobs, freelance tasks, and short projects across Australia. Create your profile, set your work preferences, and apply for your first opportunity today.
Profile Completion Checklist
| Profile Section | What to Include | Status |
| Photo | Clear face, neutral background | Required |
| Headline | 1 sentence, role and target audience | Required |
| Summary | 2 to 3 sentences with one specific achievement | Required |
| Skills | 8 to 12 specific skills with exact phrasing | Required |
| Work experience | 3 to 5 quantified bullets per role | Required |
| Education | Highest qualification listed first | Required |
| Certifications | AHPRA, CPA, Engineers Australia, ACS, or relevant body | If applicable |
| Resume PDF | Same format as SEEK or LinkedIn | Required |
| Work preferences | Full-time, freelance, project, or combination | Required |
| ABN linked | For freelancers and contractors | Optional |
Profiles that complete every required section reach the 100% completion threshold and surface to more employers and clients in CloudColleague’s discovery system.
Common Mistakes to Avoid When Creating Your Profile
- Skipping the photo or uploading a low-quality one – this is the single biggest first-impression mistake, and it affects every subsequent view of your profile.
- Writing a generic headline like “Looking for work” instead of naming your specialism and your target audience.
- Filling the summary with phrases like “hard-working” and “team player” rather than specific, results-focused statements.
- Listing skills you cannot actually demonstrate – clients verify these during interviews and project briefs, and padding damages trust.
- Leaving work preferences blank – this disables CloudColleague’s three-in-one matching and cuts your visible opportunity pool significantly.
- Skipping certifications and professional registrations that would boost your visibility in regulated fields, particularly AHPRA, CPA Australia, Engineers Australia, and ACS.
Your Next Step
A complete, well-written CloudColleague profile is the single highest-leverage thing you can do for your job search or freelance pipeline. The setup takes under 10 minutes, and the effort compounds every time you apply for a role, pitch a project, or get discovered by a new client.
Ready to get started? Login into your free CloudColleague profile right now. Full-time jobs, freelance tasks, and short projects, all in one Australian profile. When you are ready to go further, read how to apply for jobs on CloudColleague for the full application guide.
Frequently Asked Questions About Creating a CloudColleague Profile
Creating a CloudColleague profile takes eight to ten minutes for most users. Signup itself takes under two minutes. Completing each profile section typically takes another six to eight minutes.
Yes. Creating a profile is completely free for job seekers, freelancers, and contractors. Optional paid features exist for additional visibility, but the core profile setup and all job applications are fully free.
Write two to three sentences covering who you are, what you do, and one concrete achievement or signature skill. Avoid generic phrases like “hard-working” or “team player.” Specific, results-focused summaries consistently outperform generic ones.
Yes. A resume PDF is required for full profile completion. Use reverse-chronological format with quantifiable achievements. It submits automatically when you apply for full-time roles.
Yes. Many users have full-time jobs and use CloudColleague to access freelance tasks or short projects on the side. Set your work preferences to freelance or project work to match after-hours opportunities.
Complete every profile section to 100% and use a clear professional photo. Write a specific headline naming exactly what you do. Furthermore, include quantifiable results in your work experience and list eight to twelve specific skills.
Yes. CloudColleague verifies employers and clients before listings go live. Secure payment processing follows Australian Taxation Office requirements for sole trader and freelance income reporting.